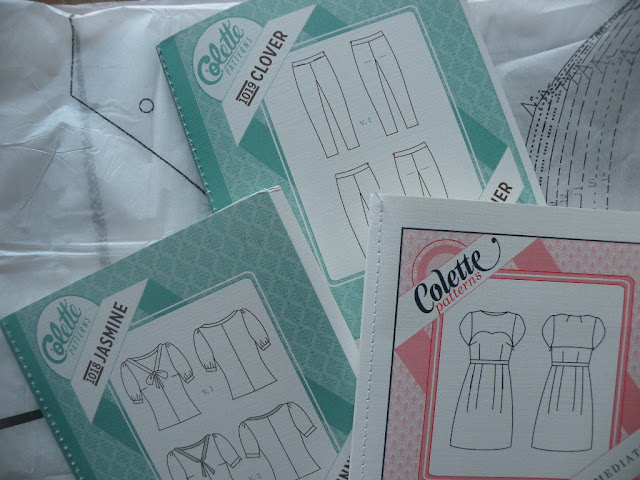
I couldn't resist the Jasmine blouse pattern, I had to make a quick muslin...
Things to change:
- I can pull the blouse on easily, so I'm going to cut a size smaller, but keep the bust darts at the same height
- I make the cuff tighter by 2 cm and gather the remaining width of the sleeve at the cuffs
- Instead of using the loop I've just tied the ties and it worked perfect! (this is version 2 with the long ties)
- I might even lengthen the ties like in my inspirational picture here
- As the neckline is quite wide I might add loops for my bra-straps on the inside or make the neckline less wide (about 1,5 cm on each side)
Friday, September 30, 2011
Goodies
My new Colette patterns have arrived yesterday! I think I quickly need to make a Jasmine blouse...
Wednesday, September 28, 2011
Progress
My little assistant 'at work' - in front of my sewing table of course... (again, she managed to sit on my muslin)
I didn't realize there was a yellowish stripe on one of the bodice pieces, just saw it after stitching:
Had to cut a new one of course...
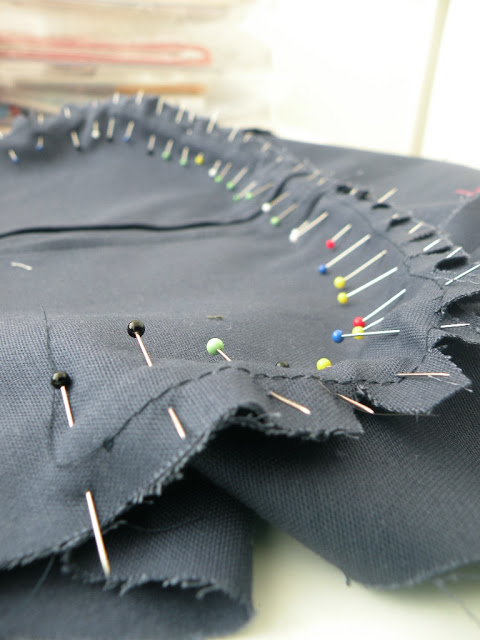
All pinned up before stitching (because of the sunlight there is not one picture which represent the real blue color of this fabric)
The finished insert and the pleat for the buttons at the front:
Could work
Today I added a few new pics to the 'Dresses I like' section.
This grey dress is so pretty! I have a pattern which looks very similar:
Modcloth 'About the artist dress' and Simplicity 2403.
View A has the right ruffle front and sleeves, which can be combined with the shirtdress collar version (left on the cover)
Saturday, September 24, 2011
Peter Pan collar for the Burda dress
Yesterday relaxed a bit with a cappuccino in the garden. The sun is back after a wet and cold summer.
I made a sketch of the dress. Finally I found the right fabric. They didn't have it in dark green, so I took the dark blue one. It is a thicker cotton sateen which is not shiny.
The weather was nice and warm so I couldn't resist reading the newest Karin Slaughter book 'Fallen'. All of her books are great. While I generally don't like love-stories I really can't wait to find out when Sarah and Will finally get together... I guess I have to finish the book first before I can go on with my dress!
I drafted the Peter Pan collar today. I used the tutorials of Gertie here to draft the collar pattern.
One thing I changed is that my collar pieces meet up almost in the middle. Because there is a zipper in the back I left just a bit in between the two parts (a total of 0.5 cm =1/5'').
First I placed the front and back pieces together to create the neckline. I used 1/2'' (=1.3 cm) overlap at the sleeve end of the shoulder seam.
I used the same width as explained int the tutorial which is 1 3/4'' (about 4,5 cm)
As for the front insert piece, I decided to omit the tucks because my fabric is quite heavy. I'm going to make 2 valse pleats for the row of buttons (on the right) I think that will be enough.
Update:
My mom just called and mentioned a dark green fabric (!!!) she has. Apparently I bought it years ago and she thought I could use it with my new sewing adventures. I didn't think of asking her about fabrics yet, so I was quite surprised she spontaneously came up with something that fits into my fall palette!
I guess I need to make the 40 minutes drive to that fabric store to be able to tackle the other colors...
Making an a-line skirt for the Burda dress
I want to make a flared, basically an A-line skirt for this dress.
First I made a muslin with the original pattern which is a pencil skirt. I took the same size as for the dress, which 1 size smaller than my measurements.
I only sew up the upper part of the skirt because I was interested in the fit around the waist and hip area. The fit is good. It has slightly more ease than a skirt would have but that's because it is made for a dress. It doesn't have to sit tightly around the waist...
To draft an A-line skirt I used my Mom's diagram here (she did a pattern drafting course somewhere back in the eighties and she gave me her notes)
- One thing I corrected first is that I've straightened out all of the lines from the hips below. As I mentioned the original skirt is a pencil skirt which is narrower at the bottom. - Then I opened up the dart and cut the pattern open straight from the dart point down.
By pivoting I closed the top points of the dart, this opened up the lower part. This way I basically transferred the extra ease to the lower part of the skirt:
- I added extra 4 cm (1.6'') to the side seam at the bottom and from there I drew a line up to the widest part if the hips:
- Filled the empty spaces up by attaching another piece of paper. This is it! The measurements of the new pattern are exactly the same as the original one.
A good tutorial, which basically explains the same is to find here.
(Note: The tutorial in the link instructs to take 1/2 of the width of the inserted piece after closing the darts. For me it is the same as the 4 cm my mom's book istructed)
Just to be sure, I made a muslin of the new skirt pattern. As usually I only made the top part to get to see the fit around the waist and hips. I also basted a zipper in the dress muslin to get a better view. (The wrinkles are caused by the zipper which I only basted but not securely inserted.)
The only thing I need to change is to slightly lengthen the bodice back in the middle. When sewing I already added about 6 mm all around in the length. On the pics below looks like it is perfectly straight but in reality I need to add about 1 cm. I guess it is a minimal swayback adjustment. The skirt looks perfect, the side seam lies perfectly in the middle:
Thursday, September 22, 2011
Muslin for the Burda dress
Remember my fall sewing plans? I wanted to start out with a Burda pattern. I buy the Burda magazine occasionally, just when something catches my eye. But, I grew up with Burda magazines in Hungary, my mother used to buy them regularly end of eighties begin nineties. The first things I made were Burda patterns. When I was about 14 I made just everything, from jackets to trousers, from skirts to shirts. I wouldn't say everything was successful and I also ended up with tons of UFO's of things that just didn't fit. No, I didn't realize the importance of making muslins back then...
Anyway, I decided to make a dress (model 125) from the october Burda magazine. What I like about is the beautiful lines, the sleeves and that it is a fitted dress. What I don't like is of course the skirt, I would prefer a flared model and I don't like the lace insert. Especially because the insert is quite wide and I already have visions of my bra straps showing through... just don't like the idea.
I don't have a fabric yet but my dress idea is inspired by this pretty dress. It would be easy to add a few tucks and buttons to the insert. I like the contrasting collar too! Instead of the original standing collar I choose to make another one. The same Burda magazine had a few dresses with Peter Pan collars too, so I took one to try out.
I remembered that Burda patterns usually have a lot of ease (too much for my liking) so I traced a size smaller than my measurements. European patterns doesn't have seam allowances included but after working with a few overseas patterns I find it really easy to have a standard 1.5 cm (5/8''). It is just much easier to sew! I used to spend a lot of time for basting the pieces together because I always ended up with a different amount of seam allowance on every piece I cut... Now I just pin and stitch, it saves me hours and hours! As you can see on the picture above I've spent more time on tracing the pattern pieces as usual. After tracing and before cutting I've added the seam allowance.
As usual, I made up a muslin bodice with just one sleeve and one half collar. It turned out sooooo pretty!
So, what do I think of the muslin?
- The overall fit is great!
- I forgot to mention that this one is a petite size dress (= both the bodice and the skirt are shorter but have the same width as the normal sizes), but I figured it wouldn't be a problem because I'm short waisted. After all, the length with the seam allowance included would be the right bodice length for me, so I need to add once more the seam allowances on the bottom.
- The fit around the neck is nice.
- The collar doesn't fit well, so I have to draft another one for the dress, but I definitely like the look of it.
- This dress has a kind of dropped shoulder look which I actually like. (You can see it on the model in the back dress too, so it is not a fitting problem, rather a feature...)
- The sleeves fit just right, I think I might add 1 cm in width to the seam binding just to make it more comfortable when moving.
- I think I keep the upper part of the skirt (which is a basic fitted skirt with 2 darts in the front and 2 darts in the back) But instead of making it smaller towards the hem I'm going to make it in a trapezium shape, just slightly wider on the bottom. I just want to keep it simple because the bodice is already busy.
Wednesday, September 21, 2011
Laptop sleeve from IKEA cushion cover
I've recently bought my MAC laptop and wanted a laptop sleeve to protect it. It is handy if you have to take your laptop with you in a bag or just to store it at home. The prices were 25 € and up, so I decided to make one myself. Of course, with as little effort as possible... If you can sew you don't want to pay too much for something like this because it is so easy to make.
I decided to start out with a cushion cover with a zipper already inserted. I went to IKEA and choose the 'Ritva' pillow cover. It costed only 4.99 €. It is made out of a sturdier fabric: a thick cotton with a nice structure. The original size was 50x50 cm. I prewashed it in really hot water to let it shrink a bit.
My laptop is 13'' (=33 cm), so I added a few cm's at the sides because of the thickness of the laptop and the lining and because I wanted to have a little extra room (in that way the zipper won't scratch the laptop surface). I ended up with +5 cm in width.
I saved the zipper of course, just left it in place and cut through it when taking in the width. The finished size of the sleeve is approx. 38x28 cm from side to side.
For the lining I used a double layer of a lime green 'Polarvide' fleece blanket (1.99 €). I made the lining 'envelope' first, then inserted with the wrong side out and hand sewn it around the edges to attach it to the black sleeve layer.
For about 7 € I've got my laptop sleeve!
Sunday, September 18, 2011
Fall sewing plans
Clover pants, Jasmine blouse, Macaron dress and Ceylon dress from Colette Patterns a bow blouse and dress from the october 2011 Burda magazine
I've ordered the Clover pants and Jasmine blouse from the new collection. I'm totally in love with the bow blouse, I'm going to make both versions. How about a stretch corduroy fabric for the pants? I'd like to make a Ceylon dress with 3/4 sleeves, in a darker color. For the Macaron dress I'm thinking of using a crocheted insert for the upper bodice part. This would make the dress more delicate, I think it would look lovely! The another bow blouse is from the new Burda magazine has simple lines - I might add a few darts to make it more fitted.
As for the colors, I've tried to put together some kind of fall palette here. I'd like to use dark green, brown, plum, grey and dark indigo blue. For an accent color I might choose soft pink:
Fall palette idea
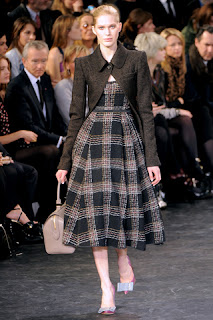
Dark blue bow blouse: Modcloth, Plum bow blouse: Banana republic, Plaid dress: Louis Vuitton, Grey heels: Steve Madden
Saturday, September 17, 2011
'Waiting for the fall' - Knipmode skirt finished!
Fabric: cotton corduroy
Pattern: Knipmode (Dutch magazine) 5/2011 model 22
- It is a summer skirt pattern but I was attracted by the little flared model and the huge pockets and thought it would work great for a heavier skirt which I could wear with boots for the fall. This is the first skirt I make which is doesn't have a lowered waist which I normally prefer.
- I used a corduroy fabric which I had cut up about 10 years ago, remaining with a bunch of UFO's
- I like how the hem stays out a bit because of the stiffness of the fabric
- The instructions given in the magazine weren't really clear, I figured it out anyway...
- To perfect the fit I had to add 2 darts both in the front as in the back
- I used leftover butterfly fabric from this project for the facing of the waistband
- The original pattern instructed making belt loops too, which I eliminated, just because I don't want to wear a belt with this skirt.
- The only thing left is to make a muslin for the waistband - am I working backwards??? The reason: I really love this skirt but I can't make another one since I did all the changes along the way on the fabric while sewing. To start with, I'm going to try to cut a size smaller, because I had to take in about 4 cm in the waist, plus added darts witch took out another cm of 3...
<
Subscribe to:
Posts (Atom)